
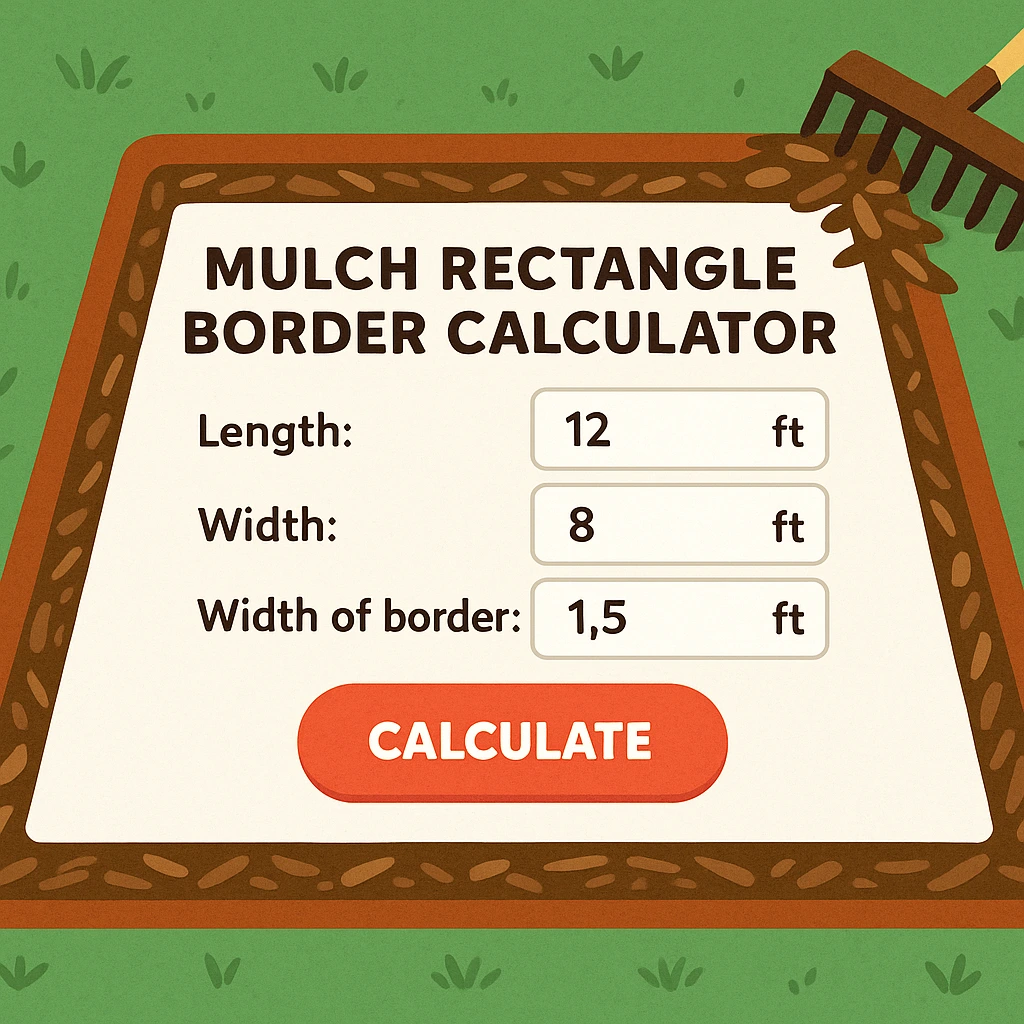
Mulch rectangle border calculator
Mulch Rectangle Border Calculator
Calculate mulch for a rectangular border, frame-style garden bed, patio surround, pool border, foundation planting strip, walkway frame, or lawn perimeter. Enter either the outer rectangle plus a uniform border width, or enter both outer and inner rectangle dimensions, then estimate border area, mulch volume, cubic yards, bags, edging length, landscape fabric coverage, and cost.
Calculate Mulch for a Rectangular Border
Use the border width method when the strip is the same width on all four sides. Use the exact dimensions method when one side is wider, the inner rectangle is offset, or you already know both rectangles from a plan.
Units and Mulch Order Inputs
Results
What the Mulch Rectangle Border Calculator Does
The Mulch Rectangle Border Calculator estimates the amount of mulch needed for a frame-shaped rectangular bed. It is designed for border areas where an outer rectangle surrounds an inner rectangle, such as a patio border, pool surround, building foundation bed, lawn frame, raised bed perimeter, driveway edge, or rectangular walkway border. Instead of treating the whole outer rectangle as mulch, the calculator subtracts the inner rectangle and counts only the border strip.
This page is intentionally focused on rectangle borders, not solid rectangular beds. If the whole rectangle is being mulched from edge to edge, use the mulch rectangle calculator. If the bed is a square, use the mulch square calculator. If the bed is triangular or trapezoidal, use the mulch triangle calculator or mulch trapezoid calculator. Circular borders are a different geometry, so use the mulch circle border calculator, mulch annulus calculator, or mulch circle volume calculator when the project is round.
The main purpose of a rectangle border calculator is to avoid over-ordering. A 30 foot by 20 foot outer rectangle has an area of 600 square feet. If the center is a 24 foot by 14 foot patio, the mulched border is not 600 square feet. The inner patio area is 336 square feet, so the border is only 264 square feet. That difference changes mulch volume, bag count, bulk yardage, edging length, landscape fabric, and cost.
Rectangle Border Area Formula
A rectangular border is calculated by subtracting the inner rectangle from the outer rectangle. The outer rectangle describes the outside boundary of the mulch bed. The inner rectangle describes the area that will not receive mulch, such as a patio, pool deck, lawn panel, walkway, driveway, or building footprint.
Here, \(L\) is length and \(W\) is width. If the outer rectangle is 30 feet by 20 feet, its area is \(30\times20=600\) square feet. If the inner rectangle is 24 feet by 14 feet, its area is \(24\times14=336\) square feet. The border area is \(600-336=264\) square feet.
For a separate area-only check, the rectangle area calculator can confirm each rectangle before subtraction. For mixed landscape projects, the broader area calculator is useful when several shapes are being combined into one material order.
Border Width Method
The border width method is fastest when the border has the same width on all four sides. You measure the outer length, measure the outer width, and measure the strip width from the outer edge to the inner edge. Because the strip appears on both opposite sides, the inner dimensions are found by subtracting twice the border width.
If the outer rectangle is 30 feet by 20 feet and the border width is 3 feet, the inner length is \(30-2(3)=24\) feet. The inner width is \(20-2(3)=14\) feet. The outer area is 600 square feet, the inner area is 336 square feet, and the border area is 264 square feet.
This method assumes a centered inner rectangle and a uniform border width. It works well for a neat patio frame, a formal lawn border, or a rectangular pool surround with a consistent strip on each side. It does not work perfectly if one side is wider than another, if the inner feature is offset, or if the border changes width around corners. In those cases, use the exact dimensions method.
Exact Dimensions Method
The exact dimensions method is better when the border is not uniform. Many real projects have a wider planting bed on the visible front side, a narrow maintenance strip behind a patio, or an offset pool deck. Instead of assuming a single border width, measure the outer rectangle and inner rectangle directly. The calculator subtracts the two areas and estimates mulch for the actual rectangular frame.
Use exact dimensions when a landscape plan gives both outside and inside measurements, when existing edging is already installed, when a walkway runs closer to one side than the other, or when the border has been intentionally designed for asymmetry. The formula is the same, but the inputs are more realistic:
The exact method also helps diagnose whether a border width is reasonable. If the outer dimensions are 32 feet by 22 feet and the inner dimensions are 28 feet by 12 feet, the average side widths are not the same in both directions. That may be intentional, but it should be visible in the plan. When the border is not uniform, exact dimensions protect the material estimate from a simplified assumption.
Mulch Volume Formula for a Rectangle Border
After the border area is known, mulch volume is area multiplied by the new mulch depth. The area is normally measured in square feet, so the depth must be converted to feet before multiplication.
A 3 inch layer is \(3/12=0.25\) feet. If the border area is 264 square feet, the raw volume is:
The calculator then applies the selected settling and overage allowance:
With 10% overage, the order volume becomes \(66\times1.10=72.60\) cubic feet. Since \(1\text{ yd}^3=27\text{ ft}^3\), the bulk order volume is \(72.60/27=2.69\) cubic yards. For a general volume check, use the volume calculator. For bulk yardage planning, the cubic yard calculator and square feet to cubic yards calculator are useful companions.
Worked Example: Patio Border
A homeowner wants a 3 foot mulch border around a 24 foot by 14 foot patio. The outer rectangle will be 30 feet by 20 feet because the border extends 3 feet beyond each side of the patio.
At 3 inches deep, raw volume is \(264\times0.25=66\) cubic feet. With 10% overage, order 72.60 cubic feet or 2.69 cubic yards. With 2 cubic foot bags, the minimum is 37 bags, and one extra reserve bag brings the practical purchase to 38 bags.
Worked Example: Foundation Border
A foundation bed surrounds a rectangular section of a building. The outer rectangle is 40 feet by 12 feet. The inner rectangle next to the building footprint is 36 feet by 8 feet. The border area is:
If the target depth is 2.5 inches and no mulch exists, depth is \(2.5/12=0.2083\) feet. Raw volume is \(192\times0.2083=40.00\) cubic feet. With 10% overage, order 44 cubic feet, or 1.63 cubic yards. Keep mulch below siding and away from vents, weep holes, wood trim, and foundation openings.
Edging and Border Perimeter
Rectangle borders often need edging on both the outside and inside boundaries. The outside edge separates the mulch from lawn, gravel, or another planting area. The inside edge separates mulch from the patio, pool deck, walkway, driveway, or central lawn. The calculator estimates both perimeters and adds the selected edging allowance for corners, cuts, overlaps, and product length rounding.
For the 30 foot by 20 foot outer rectangle and 24 foot by 14 foot inner rectangle, the outer perimeter is \(2(30+20)=100\) feet. The inner perimeter is \(2(24+14)=76\) feet. Total raw edging is 176 feet. With a 10% allowance, the purchase estimate is 193.6 feet. Product packaging may require additional rounding, especially for metal edging, paver units, stone blocks, or fixed-length plastic edging.
If the inner boundary is a hard edge such as a patio slab, you may not need separate edging along that side. In that case, use the calculator result as the maximum edge length and subtract any boundary that is already physically contained. The quantity for mulch does not change, but the edging purchase can change a lot.
Depth, Existing Mulch, and Refresh Work
Rectangle borders are often refreshed each season. If old mulch is already present, calculate only the missing depth, not the full target depth. The calculator subtracts the existing depth from the target depth:
If the border area is 264 square feet, the target depth is 3 inches, and the existing mulch depth is 1 inch, the new depth is 2 inches. The raw refresh volume is \(264\times(2/12)=44\) cubic feet. With 10% overage, order 48.4 cubic feet. That is much less than installing a new 3 inch layer from bare soil.
Measure existing depth after loosening the surface lightly with a rake. Borders can be uneven because mulch gets pushed toward corners, pulled onto hardscape, blown by maintenance equipment, or washed downhill. Check the long sides, short sides, corners, and any narrow section near doors, steps, or downspouts. Use a practical average instead of the deepest or shallowest single point.
For new installation, 2 to 3 inches is common for decorative patio borders and walkway edges. Use 3 inches for many shrub and perennial borders. Use 3 to 4 inches when weed suppression and moisture retention are priorities, but avoid piling mulch against stems, trunks, siding, posts, or foundations. Deep mulch is not automatically better; the right depth depends on plants, drainage, climate, and maintenance.
Unit Conversions Used in the Calculator
The calculator lets you measure length in feet, inches, yards, or meters, then reports results in practical ordering units. Internally, U.S. results are easiest when length is converted to feet, area is calculated in square feet, and depth is converted to feet. The volume then comes out in cubic feet.
The most important depth conversion is:
For bulk orders, cubic feet convert to cubic yards with:
For bagged mulch, the bag estimate is:
The ceiling symbol means round up. If the mathematical result is 36.3 bags, the minimum purchase is 37 bags. The calculator can also add reserve bags for touch-up. Reserve bags are useful for rectangular borders because corners and hardscape edges often need extra hand finishing after the first watering or rain.
If your field measurements are metric but your supplier sells bulk mulch by the cubic yard, the calculator bridges that unit gap. If your supplier sells by cubic meter, use the cubic meter result as the primary order quantity and the cubic yard result only as a reference.
Bagged Mulch vs Bulk Mulch
Bagged mulch is convenient for small rectangle borders, apartment patios, tight side yards, and projects where material must be carried through a gate. Bags are easy to stage evenly around the border. Bulk mulch is usually more efficient for large borders or when several beds are installed during the same project. This calculator reports both cubic feet and cubic yards so you can compare options.
Bagged mulch is often sold in 1.5, 2, or 3 cubic foot bags. If the border needs 48 cubic feet and the bag yield is 2 cubic feet, the mathematical estimate is 24 bags before reserve. If each bag costs 4.50 dollars, the bag material estimate is \(24\times4.50=108\text{ dollars}\). If you add two reserve bags, the bag purchase is 26 bags, or 117 dollars at the same price.
Bulk mulch is usually sold by the cubic yard. If the same project needs 48 cubic feet, the bulk amount is \(48/27=1.78\) cubic yards. If the supplier sells half-yard increments, the practical order may be 2 cubic yards. If bulk mulch costs 38 dollars per cubic yard, the material estimate is \(2\times38=76\text{ dollars}\), before delivery or loading fees. The cheaper option depends on supplier pricing, delivery, storage space, labor, and cleanup.
For very large border projects, estimate each border section separately and then combine the cubic yard totals. This keeps the shape math accurate while still allowing one supplier order. If the same site also uses stone or gravel, compare quantities with the gravel calculator because stone depth, density, and purchase units may differ from mulch.
Choosing the Right Border Width
Border width affects appearance, planting space, maintenance, and material cost. A narrow 18 inch border can define an edge, but it may not support shrubs or layered plantings. A 4 foot border gives room for perennials and small shrubs. A 6 foot border can make a strong landscape statement, but it also increases mulch quantity and maintenance area.
| Application | Common width | Practical notes |
|---|---|---|
| Patio border | 2 to 4 feet | Use enough width for planting and access without shrinking usable patio space. |
| Pool surround | 3 to 5 feet | Keep mulch contained and choose material that will not easily track into the pool. |
| Foundation bed | 3 to 6 feet | Maintain clearance from siding, vents, wood trim, and foundation openings. |
| Walkway frame | 1.5 to 3 feet | Narrow borders need good edging so mulch does not migrate onto the walkway. |
| Driveway border | 2 to 4 feet | Account for vehicle doors, snow removal, runoff, and tire splash. |
Because border area grows as width increases, small design changes can create large material changes. A 30 foot by 20 foot outer rectangle with a 2 foot border has inner dimensions 26 feet by 16 feet and border area 184 square feet. The same outer rectangle with a 4 foot border has inner dimensions 22 feet by 12 feet and border area 336 square feet. Doubling the border width does not merely double the visible strip; it changes both inner dimensions and the final frame area.
Applications for Rectangle Border Mulch
Patio borders soften the edge between hardscape and planting. They also create a zone for low shrubs, ornamental grasses, lighting, and seasonal color. For patios, containment is important because foot traffic can pull mulch onto the surface. Use edging, keep the mulch slightly below the patio edge, and avoid very light mulch if wind is a problem.
Pool borders need special care. Mulch should not wash or blow into the water, and it should not create slippery transitions around walking surfaces. Many pool surrounds use stone, rubber mulch, or larger bark pieces rather than fine shredded mulch. The calculator still helps with volume, but material choice should fit safety, maintenance, and drainage conditions.
Foundation borders can improve curb appeal and reduce trimming near the building, but they must be designed around moisture control. Keep mulch away from siding, wood, vents, and weep holes. Grade the bed so water moves away from the structure. A beautiful foundation border is not successful if it traps moisture against materials that should stay dry.
Walkway and driveway borders are often long and narrow. In these cases, exact dimensions may be better than the uniform border method because the strip may widen at entrances, steps, or planting pockets. Long borders also make edging important. Even a small amount of mulch migration can look messy along a straight hardscape edge.
Formal lawn panels and courtyard frames depend on clean geometry. If the inner lawn or paver field is meant to look centered, mark the outer and inner rectangles with string before ordering material. A rectangle border can visually correct or emphasize alignment, so measure diagonals and check corners before installing permanent edging.
Landscape Fabric, Edging, and Installation Details
Landscape fabric is sometimes used under border mulch, especially for permanent patio and foundation beds. Fabric can reduce weeds when installed well, but it is not a substitute for bed preparation. Remove grass and weeds first, grade the soil, overlap fabric seams, pin the fabric securely, and cut clean openings around plants. If fabric is loose or exposed, it can show through mulch and make maintenance harder.
Edging controls the shape. For rectangle borders, corners matter as much as straight runs. A poor corner can make the entire frame look crooked. Use stakes and string to establish straight lines, measure diagonals to square the layout, and install edging before spreading mulch when possible. If the inner boundary is a patio or walkway, the hard edge may already define that side; the outer boundary may still need edging to keep lawn from creeping into the bed.
Installation is easiest when material is staged around the border rather than dumped in one pile. For bagged mulch, place bags every few feet along the long sides and near corners. For bulk mulch, use wheelbarrow loads and assign rough load counts to each side. A rectangular frame looks best when the long sides, short sides, and corners are spread to the same depth.
- Confirm the outside and inside rectangle dimensions.
- Mark both boundaries with stakes, string, marking paint, or a garden hose.
- Remove turf, weeds, stones, and debris from the border area.
- Grade soil for drainage, especially near buildings, pools, and patios.
- Install edging where the border needs containment.
- Install landscape fabric only when it fits the planting and maintenance plan.
- Stage mulch around the frame instead of dumping all material in one place.
- Spread in light passes and measure depth at several points.
- Keep mulch away from trunks, stems, siding, posts, and hardscape joints.
- Water lightly or wait for rain, then use reserve mulch for thin spots.
Measuring and Marking a Rectangle Border
Accurate measurement begins with a clear definition of the outer and inner boundaries. The outer boundary is the far outside edge of the mulch. The inner boundary is the edge of the area excluded from mulch. In a patio border, the inner boundary is often the patio edge. In a lawn frame, the inner boundary is the rectangular lawn panel. In a foundation border, the inner boundary may be the building face or a setback line that keeps mulch away from the structure.
Measure length and width at more than one point. Existing patios, lawns, and driveway edges are not always perfectly rectangular. If opposite sides differ slightly, decide whether you are estimating the existing shape or correcting it during installation. If the new edging will create a true rectangle, measure the planned rectangle, not the old irregular edge.
Check diagonals when squareness matters. A rectangle with equal diagonals has square corners. If diagonals are different, the layout is a parallelogram or an irregular quadrilateral. The area estimate may still be close for small differences, but edging and visual alignment can suffer. For formal designs, square the layout before calculating final material quantities.
For uniform borders, measure the border width perpendicular to the edge, not diagonally at a corner. The width is the shortest distance from outer edge to inner edge. Corner areas are already included when the formula subtracts the inner rectangle from the outer rectangle. Do not add corner squares separately unless the geometry is not rectangular.
Non-Uniform Borders and Irregular Site Conditions
Many rectangle borders are described as rectangular even when they have small irregularities. A patio may have steps on one side. A pool deck may include equipment pads. A foundation bed may jog around a porch. A walkway border may flare at an entrance. The calculator works best for rectangular frames, so irregular features should be handled intentionally.
If the irregularity is small, use the closest rectangle and a reasonable overage allowance. If the irregularity is large, break the project into separate shapes. For example, calculate the main rectangle border, then calculate an added rectangular planting pocket separately. If a corner is triangular, calculate that area separately and add it to the total. This approach is more accurate than forcing everything into one rough frame.
If the border is L-shaped, it is usually better to split it into rectangles. A single outer-minus-inner rectangle may count areas that are not actually mulched. Measure the long strip, measure the short strip, subtract any overlap if necessary, and combine the results. For complex plans, sketch the bed and label each simple shape before entering numbers.
Slopes also matter. A sloped rectangle border may need a little more mulch because the surface area is slightly larger than the flat plan view and because runoff can move material. The difference is often small for gentle slopes, but overage is helpful. On steep slopes, material selection, edging, and erosion control matter more than simply increasing volume.
Budgeting a Rectangle Border Project
A good budget separates geometry, material, edging, fabric, delivery, preparation, and labor. The calculator covers the geometric core: border area, volume, bags, bulk cubic yards, edging length, and optional material cost. The final project cost may also include disposal of sod, landscape fabric, staples, edging stakes, soil amendments, plants, delivery, tool rental, and cleanup.
For bagged mulch, the material estimate is:
For bulk mulch, the material estimate is:
The purchase quantity may differ from the exact calculated quantity. Bags must be whole numbers. Bulk mulch may be sold by the half yard, quarter yard, or full yard. Edging may be sold in fixed lengths. Fabric may be sold by roll width and length. The cost calculator can help combine multiple cost items once the material quantities are known, and the construction calculator can support broader project estimates.
If you are comparing quotes, make sure each quote uses the same depth, same overage, same edge assumptions, and same included labor. One quote may include fabric and edging while another includes mulch only. A rectangle border may look simple, but the scope can vary a lot depending on demolition, drainage, plant installation, and hardscape protection.
Quality Checks Before Ordering
Before buying mulch, confirm the project is truly a border. If the entire rectangle is being covered, this page will understate the quantity because it subtracts an inner area. If the center is excluded, this page is correct. The first quality check is shape intent: full rectangle or rectangular frame.
Next, confirm the measurement method. In the border width method, the border width is subtracted from both sides of each dimension. If the border is 3 feet wide, inner length decreases by 6 feet and inner width decreases by 6 feet. If that produces zero or negative inner dimensions, the border width is too large for the outer rectangle.
Then check the depth unit. Three inches is 0.25 feet. Three feet is 36 inches and is not a normal mulch layer. If the output looks extremely high, the depth unit is one of the first things to review. Also check whether existing depth should be 0 for new work or a measured value for refresh work.
Finally, use a rough mental check. At 3 inches deep, one cubic foot covers about 4 square feet. A 2 cubic foot bag covers about 8 square feet. If the border area is 160 square feet, expect about 20 two-cubic-foot bags before overage. If the calculator result is far from that, review dimensions, units, depth, and bag yield.
How Border Width Changes the Mulch Order
Border width is one of the most important design choices because it changes the area on all four sides at once. A wider border is not just a longer strip; it also changes the corner squares and reduces the inner rectangle. That is why a small width adjustment can change the order by several bags. Before committing to a width, test two or three possible designs in the calculator and compare the material difference.
For example, keep the outer rectangle fixed at 30 feet by 20 feet. With a 2 foot uniform border, the inner rectangle is 26 feet by 16 feet. The border area is \(600-416=184\) square feet. With a 3 foot border, the inner rectangle is 24 feet by 14 feet. The border area is \(600-336=264\) square feet. With a 4 foot border, the inner rectangle is 22 feet by 12 feet. The border area is \(600-264=336\) square feet.
At 3 inches deep, those raw volumes are 46 cubic feet, 66 cubic feet, and 84 cubic feet before overage. With 10% overage, they become 50.6 cubic feet, 72.6 cubic feet, and 92.4 cubic feet. With 2 cubic foot bags, the difference between a 2 foot border and a 4 foot border is more than 20 bags. This is not a reason to choose the narrowest border automatically; it is a reason to make the design decision intentionally.
Width also affects usability. A narrow border may look clean but leave too little room for mature plants. A very wide border may create an attractive planting zone but require more mulch, weeding, irrigation, and pruning. Around patios and pools, the border should support the landscape design without making the hardscape feel cramped. Around foundations, width should allow plant spacing and maintenance access while keeping mulch and soil grades away from moisture-sensitive materials.
Combining Multiple Rectangle Border Sections
Many real projects include more than one rectangle border. A property may have a patio surround, a foundation strip, and a driveway frame installed at the same time. Calculate each section separately before combining totals. This keeps each shape honest and prevents a large rough rectangle from counting areas that are not mulched.
Use a simple worksheet approach. For each section, record the outer length, outer width, inner length, inner width or border width, target depth, existing depth, and overage. Then write down the order volume in cubic feet and cubic yards. After all sections are calculated, add cubic feet if you are buying bags or add cubic yards if you are buying bulk. If supplier rounding applies, round after combining, not before, unless the sections will be bought on different days.
For example, suppose a patio border needs 72.6 cubic feet after overage and a foundation border needs 44 cubic feet after overage. Together they need 116.6 cubic feet. That is \(116.6/27=4.32\) cubic yards. If the supplier sells half-yard increments, a 4.5 cubic yard order may be appropriate. If each section were rounded separately to the next half yard, the combined order could be slightly higher.
Keep edging separate from mulch volume. A project may combine multiple border areas into one mulch order, but edging lengths depend on which boundaries actually need edging. A patio slab may act as the inner edge for one section, while a lawn frame may need edging on both inner and outer edges. Combining mulch volume is straightforward; combining edging requires reviewing each boundary condition.
Drainage, Structures, and Plant Health
A rectangle border often sits beside a structure, patio, pool, driveway, or walkway, so drainage is part of the calculation even though it is not a formula input. Mulch should not create a dam that holds water against foundations, siding, posts, doors, or hardscape joints. If the bed is next to a building, keep grade sloping away from the structure and avoid piling mulch above the safe clearance line.
Mulch depth should be measured after grading, not before. If soil is added or removed to improve drainage, the finished surface changes. Calculate mulch after the planned soil grade is established. This is especially important near foundations, where a few inches can affect moisture exposure. A beautiful border can create maintenance problems if it traps water where water should drain away.
Plant health also depends on depth and placement. Keep mulch away from shrub stems, perennial crowns, and tree trunks. Around woody plants, a flat, even layer is better than a mound. Around herbaceous plants, avoid burying crowns where new growth emerges. In planted borders, spread gently by hand near stems and use a rake only in open spaces.
Different mulch materials behave differently. Fine shredded mulch knits together and can stay in place on gentle slopes, but it may compact over time. Large bark nuggets allow more airflow but can float or move in heavy runoff. Cedar, hardwood, pine bark, and dyed mulch can all work, but the best choice depends on appearance, climate, slope, maintenance expectations, and whether the border touches a pool or high-traffic hardscape.
Ordering Workflow for Homeowners and Contractors
A reliable ordering workflow starts with measurement, not price. First, mark the outer and inner boundaries. Second, measure and choose the calculator method. Third, set target depth and existing depth. Fourth, add overage. Fifth, compare bagged and bulk quantities. Sixth, check edging and fabric needs. Seventh, confirm supplier rounding and delivery conditions.
Homeowners should take a photo or make a quick sketch with dimensions written on it. This makes it easier to remember which number is length, width, border width, or inner opening. It also helps at the store if you need to compare bag yields. Many bag labels look similar, but a 1.5 cubic foot bag and a 2 cubic foot bag change the count.
Contractors should keep the calculation assumptions with the quote. A short note such as "30 by 20 outer rectangle, 24 by 14 inner rectangle, 3 inch target depth, 10% overage, edging on both boundaries" is clear and defensible. If the customer later requests a wider bed or thicker mulch, the estimate can be revised quickly. Clear assumptions protect both the installer and the customer.
Before delivery, confirm where bulk mulch will be dumped. A pile placed too far from the border increases labor. A pile placed on delicate pavement can stain or require extra cleanup. If using bags, stage them near each side of the rectangle, then open gradually. Rectangular borders are easy to overfill at corners and underfill along long sides, so distribute material deliberately rather than working from one end only.
Maintenance for Rectangular Mulch Borders
Rectangle borders need periodic maintenance because their clean lines are part of their value. Mulch gets pulled onto patios, blown into corners, displaced by irrigation, and thinned near high-traffic edges. A quick monthly rake can keep the frame shape crisp and prevent low areas from becoming weed pockets.
In spring, rake compacted mulch before adding more. Measure existing depth after loosening the surface. If the target is 3 inches and the bed already averages 2 inches, add only 1 inch. This avoids creating an overly deep layer year after year. Organic mulch decomposes and improves soil over time, but piling fresh layers without measuring can bury crowns, stems, and edging.
In summer, watch for washout near downspouts, pool splash zones, driveway slopes, and irrigation heads. If mulch repeatedly moves from one section, fix the cause. Add edging, redirect runoff, adjust sprinklers, or choose a heavier mulch texture. More mulch alone may not solve a movement problem.
In fall, remove leaves carefully so you do not remove mulch with them. After cleanup, pull mulch back from hardscape joints and foundation openings. Rectangular borders often sit beside structures, so moisture control matters. Keep mulch below siding, away from wood posts, and clear of weep holes or vents.
Keep a simple record of the dimensions, target depth, and material used. Next season, you can use the same border area and update only the existing depth, overage, and price. That makes annual refresh work faster and more consistent.
Common Mistakes to Avoid
- Calculating the full outer rectangle instead of subtracting the inner rectangle.
- Using the border width method when the border is not uniform.
- Subtracting border width only once instead of twice from each outer dimension.
- Entering inches as feet or feet as inches.
- Adding a full new layer when old mulch already remains.
- Rounding bag counts down instead of up.
- Forgetting that edging may be needed on both inner and outer boundaries.
- Ignoring corners, overlaps, cuts, and product length rounding for edging.
- Piling mulch against siding, posts, trunks, stems, vents, or hardscape joints.
- Assuming a patio or pool surround is square without checking measurements.
Practice Problems
Problem 1: Uniform border around a patio
An outer rectangle is 28 feet by 18 feet. The border width is 2 feet. Inner length is \(28-2(2)=24\) feet and inner width is \(18-2(2)=14\) feet. Border area is \((28\times18)-(24\times14)=504-336=168\) square feet. At 3 inches deep, raw volume is \(168\times0.25=42\) cubic feet. With 10% overage, order 46.2 cubic feet.
Problem 2: Exact dimensions around a pool deck
The outer rectangle is 36 feet by 24 feet and the inner rectangle is 30 feet by 18 feet. Border area is \((36\times24)-(30\times18)=864-540=324\) square feet. At 2.5 inches deep, raw volume is \(324\times(2.5/12)=67.5\) cubic feet. With 10% overage, order 74.25 cubic feet, or 2.75 cubic yards.
Problem 3: Refresh a foundation border
A border area is 210 square feet. The target depth is 3 inches and existing depth is 1.25 inches. New depth is 1.75 inches, or \(1.75/12=0.1458\) feet. Raw volume is \(210\times0.1458=30.63\) cubic feet. With 10% overage, order 33.69 cubic feet. With 2 cubic foot bags, buy 17 bags before any reserve bags.
Problem 4: Edging estimate
An outer rectangle is 30 feet by 20 feet and an inner rectangle is 24 feet by 14 feet. Outer perimeter is \(2(30+20)=100\) feet. Inner perimeter is \(2(24+14)=76\) feet. Raw total edging is 176 feet. With 10% edging allowance, plan for 193.6 feet before product length rounding.
Frequently Asked Questions
Calculate the outer rectangle area, calculate the inner rectangle area, subtract inner from outer to find border area, then multiply by mulch depth in feet. Convert cubic feet to cubic yards by dividing by 27, or divide by bag yield to estimate bags.
Use the border width method when the border is the same width on all four sides. Enter the outside length, outside width, and uniform border width. The calculator subtracts twice the border width from each outer dimension to find the inner rectangle.
Use exact dimensions when the border is not uniform, the inner feature is offset, a plan already gives both rectangles, or existing edging has different widths on different sides.
Add the outer perimeter and inner perimeter, then add an allowance for corners, cuts, overlap, and product length rounding. If one boundary is already contained by hardscape, you may not need separate edging along that boundary.
Most rectangular border beds use 2 to 4 inches. Use 2 to 3 inches for decorative patio and walkway borders, around 3 inches for many shrub and perennial borders, and 3 to 4 inches where weed suppression and moisture retention are priorities.
You can use the rectangle border area and volume logic for any rectangular border, but gravel orders often depend on material density, compaction, and recommended depth. For stone projects, compare with a gravel-specific calculator.