
Have you ever wondered how something as simple as a handful of everyday ingredients can transform into a mesmerizing, stretchy, and colorful substance that captivates both kids and adults alike? In recent years, slime has taken the DIY world by storm—not only as a fun sensory play material but also as a creative outlet, a stress-reliever, and even a tool for learning basic science. In this comprehensive guide, we’ll explore how to make slime from scratch, dive into its fascinating history, break down the ingredients and science behind its creation, and provide step-by-step instructions and creative variations to suit every need.
In this post, you’ll discover:
- A clear definition of slime and its historical background.
- A detailed overview of essential ingredients, tools, and safety precautions.
- Step-by-step recipes for basic slime and exciting variations like fluffy, clear, glow-in-the-dark, and glitter slime.
- The science behind slime: understanding polymers and crosslinking.
- Real-world applications, including educational and therapeutic uses.
- Troubleshooting tips for common slime-making challenges.
- An FAQ section addressing your most common questions and misconceptions.
- Actionable strategies and best practices to enhance your slime-making experience.
Whether you’re a parent looking for a fun, safe craft for your children, an educator seeking engaging science experiments, or an adult interested in the soothing art of DIY, learning how to make slime is a rewarding journey that sparks creativity and curiosity. Let’s dive into the world of slime and uncover its secrets together.
Table of Contents
- What Is Slime? Definition and Historical Background
- Essential Ingredients and Tools
- Step-by-Step Guide: How to Make Slime
- Creative Variations: Exploring Different Types of Slime
- The Science Behind Slime
- Real-World Applications of Slime
- Safety Precautions and Best Practices
- Troubleshooting Common Slime-Making Problems
- Actionable Tips, Strategies, and Best Practices
- Frequently Asked Questions (FAQ)
- Conclusion and Call-to-Action
What Is Slime? Definition and Historical Background
Defining Slime
At its simplest, how to make slime refers to the process of mixing certain ingredients to create a gooey, stretchy, and often mesmerizing substance. Slime is essentially a polymer—a long chain of molecules that can interact in unique ways when crosslinked. It’s soft, moldable, and can be manipulated into various shapes and textures. This versatile material can range from ultra-sticky to fluffy and airy, making it a favorite among crafters and science enthusiasts alike.
A Brief History of Slime
While the modern slime craze might seem like a recent phenomenon, the concept of creating slimy substances has been around for centuries. Here are some key historical highlights:
Early Uses and Natural Occurrences:
Natural polymers have existed long before humans began experimenting with them. From the mucus of snails to plant-based gums, these substances served various purposes in nature, such as protection and lubrication.The 20th Century and the Birth of Commercial Slime:
The commercial popularity of slime began in the 1970s when novelty toys started incorporating slime-like textures. In the 1990s and early 2000s, slime became a staple in children’s toy collections and science kits. The tactile allure of slime captured imaginations, leading to its use in classrooms as a fun way to demonstrate scientific principles.The Digital Age and DIY Movement:
With the advent of the internet and platforms like YouTube and Pinterest, homemade slime recipes exploded in popularity. DIY slime tutorials became viral sensations, encouraging millions to experiment in their kitchens and living rooms. Today, slime-making is a beloved activity that bridges the gap between art, science, and play.
For more historical context and fun facts about the evolution of polymers, you can check out educational resources on Polymer Science.
Essential Ingredients and Tools
Creating the perfect slime requires the right ingredients and tools. Whether you’re just starting out or looking to perfect your recipe, understanding what you need is the first step.
Common Ingredients for Slime
Below is a list of essential ingredients, along with some alternatives, that you might use in your slime recipes:
White Glue:
The backbone of most slime recipes. Polyvinyl acetate (PVA) glue is ideal due to its consistency and bonding properties.Borax (Sodium Borate):
A common activator that helps form crosslinks between the polymer chains in glue. (Note: Always handle borax with care and follow safety guidelines.)Water:
Used to adjust the consistency of your slime. Warm water can help dissolve borax more effectively.Food Coloring:
For adding vibrant colors and a personal touch to your slime.Optional Additives:
- Glitter or Confetti: To create sparkly or festive slime.
- Foam Beads or Shaving Cream: For a fluffy or textured variation.
- Glow-in-the-Dark Powder: For a fun, luminescent effect.
- Essential Oils: For a pleasant scent (ensure they are skin-safe).
Alternative Ingredients
For those looking for a borax-free option or simply wanting to experiment with different textures:
- Liquid Starch:
Acts as an alternative activator to borax. - Contact Lens Solution and Baking Soda:
A popular combination in many modern recipes that avoids direct use of borax. - Saline Solution:
Sometimes used alongside baking soda for a safe, household-based recipe.
Tools You’ll Need
A few simple tools can make your slime-making process smoother and more enjoyable:
- Mixing Bowls:
Choose bowls that are easy to stir and mix ingredients in. - Measuring Cups and Spoons:
Accuracy is key for achieving the desired consistency. - Spoons or Spatulas:
For thorough mixing. - Seal-able Containers:
To store your slime and keep it fresh for future play. - Gloves:
Optional, but useful if you have sensitive skin or are working with borax.
Safety Considerations
While how to make slime is a fun and generally safe activity, it’s important to remember:
- Always work in a well-ventilated area.
- Follow the recommended measurements for each ingredient.
- Supervise children during the process.
- Wash hands thoroughly after handling slime.
- If using borax, handle it with caution and store it securely out of reach of young children.
For more safety tips and guidelines, visit Kids Health – Slime Safety.
Step-by-Step Guide: How to Make Slime
Now that you have your ingredients and tools ready, let’s get into the fun part—creating your very own slime. Below is a detailed, step-by-step guide to one of the most popular slime recipes.
Basic Slime Recipe
Ingredients:
- ½ cup of white glue (PVA glue)
- ½ cup of water
- 1-2 tablespoons of food coloring (optional)
- 1 teaspoon of borax dissolved in 1 cup of warm water (this solution is your activator)
Instructions:
Mix the Glue and Water:
- In your mixing bowl, combine the ½ cup of white glue with ½ cup of water.
- Stir gently until fully mixed. The mixture should be smooth and homogeneous.
Add Color:
- Add 1-2 tablespoons of food coloring to the glue-water mixture.
- Stir thoroughly until the color is evenly distributed. This is your opportunity to create custom hues for your slime.
Prepare the Borax Activator:
- In a separate container, dissolve 1 teaspoon of borax in 1 cup of warm water. Stir until the borax is completely dissolved.
- This solution will help form the chemical bonds that give slime its unique texture.
Combine the Mixtures:
- Slowly pour the borax solution into the glue mixture while stirring continuously.
- You should see the slime begin to form almost immediately as the ingredients react.
Knead the Slime:
- Once the mixture starts to pull away from the sides of the bowl and clump together, remove it.
- Knead the slime with your hands for about 2-3 minutes until it reaches the desired consistency.
- If the slime is too sticky, add a few more drops of the borax solution and continue kneading.
Store and Enjoy:
- Place your slime in an airtight container to keep it from drying out.
- Enjoy playing with your creation! Stretch it, squish it, and marvel at its unique texture.
Tips for Perfection
Adjust Consistency:
If your slime is too runny, add a bit more borax solution; if it’s too stiff, incorporate a little water.Avoid Overmixing:
Excessive stirring can lead to bubbles in your slime. Mix just enough to get a uniform texture.Experiment Safely:
Always record your measurements if you plan to replicate a perfect batch later. Small tweaks in the ratio of glue to activator can result in different textures.
By following these steps, you’ll master how to make slime in its basic form. Once you’re comfortable with the fundamentals, you can move on to more creative variations.
Creative Variations: Exploring Different Types of Slime
One of the best parts about learning how to make slime is that there are endless possibilities to experiment with. Here are several popular variations that you can try, each offering a unique twist on the basic recipe.
1. Clear Slime
Overview:
Clear slime is transparent, allowing you to add layers of color, glitter, or small objects for decoration.
How to Make It:
- Use clear PVA glue instead of white glue.
- Follow the basic recipe, but skip the food coloring unless you want a tint.
- Once the slime is made, you can mix in glitter or small beads to create a sparkling effect.
Applications:
- Perfect for embedding small trinkets or charms.
- Great as a sensory tool for visual stimulation.
2. Fluffy Slime
Overview:
Fluffy slime has a light, airy texture that is soft to the touch. It’s achieved by adding shaving cream to the basic slime mixture.
How to Make It:
- Combine ½ cup of glue with ½ cup of shaving cream.
- Add a few drops of food coloring.
- Slowly mix in the activator (borax solution or contact lens solution with baking soda) until you reach the desired fluffy consistency.
Tips:
- The more shaving cream you add, the fluffier your slime will be.
- For extra texture, lightly fold in some foam beads.
3. Glow-in-the-Dark Slime
Overview:
This variant uses glow powder or glow-in-the-dark paint to give your slime an eerie, luminescent quality.
How to Make It:
- Prepare your basic slime.
- Once the slime is formed, knead in a small amount of glow powder or add glow-in-the-dark paint until the color is evenly distributed.
- Charge your slime under a bright light, and then watch it glow in the dark.
Applications:
- Ideal for nighttime sensory play or parties.
- Can be used as a decorative element in dark rooms.
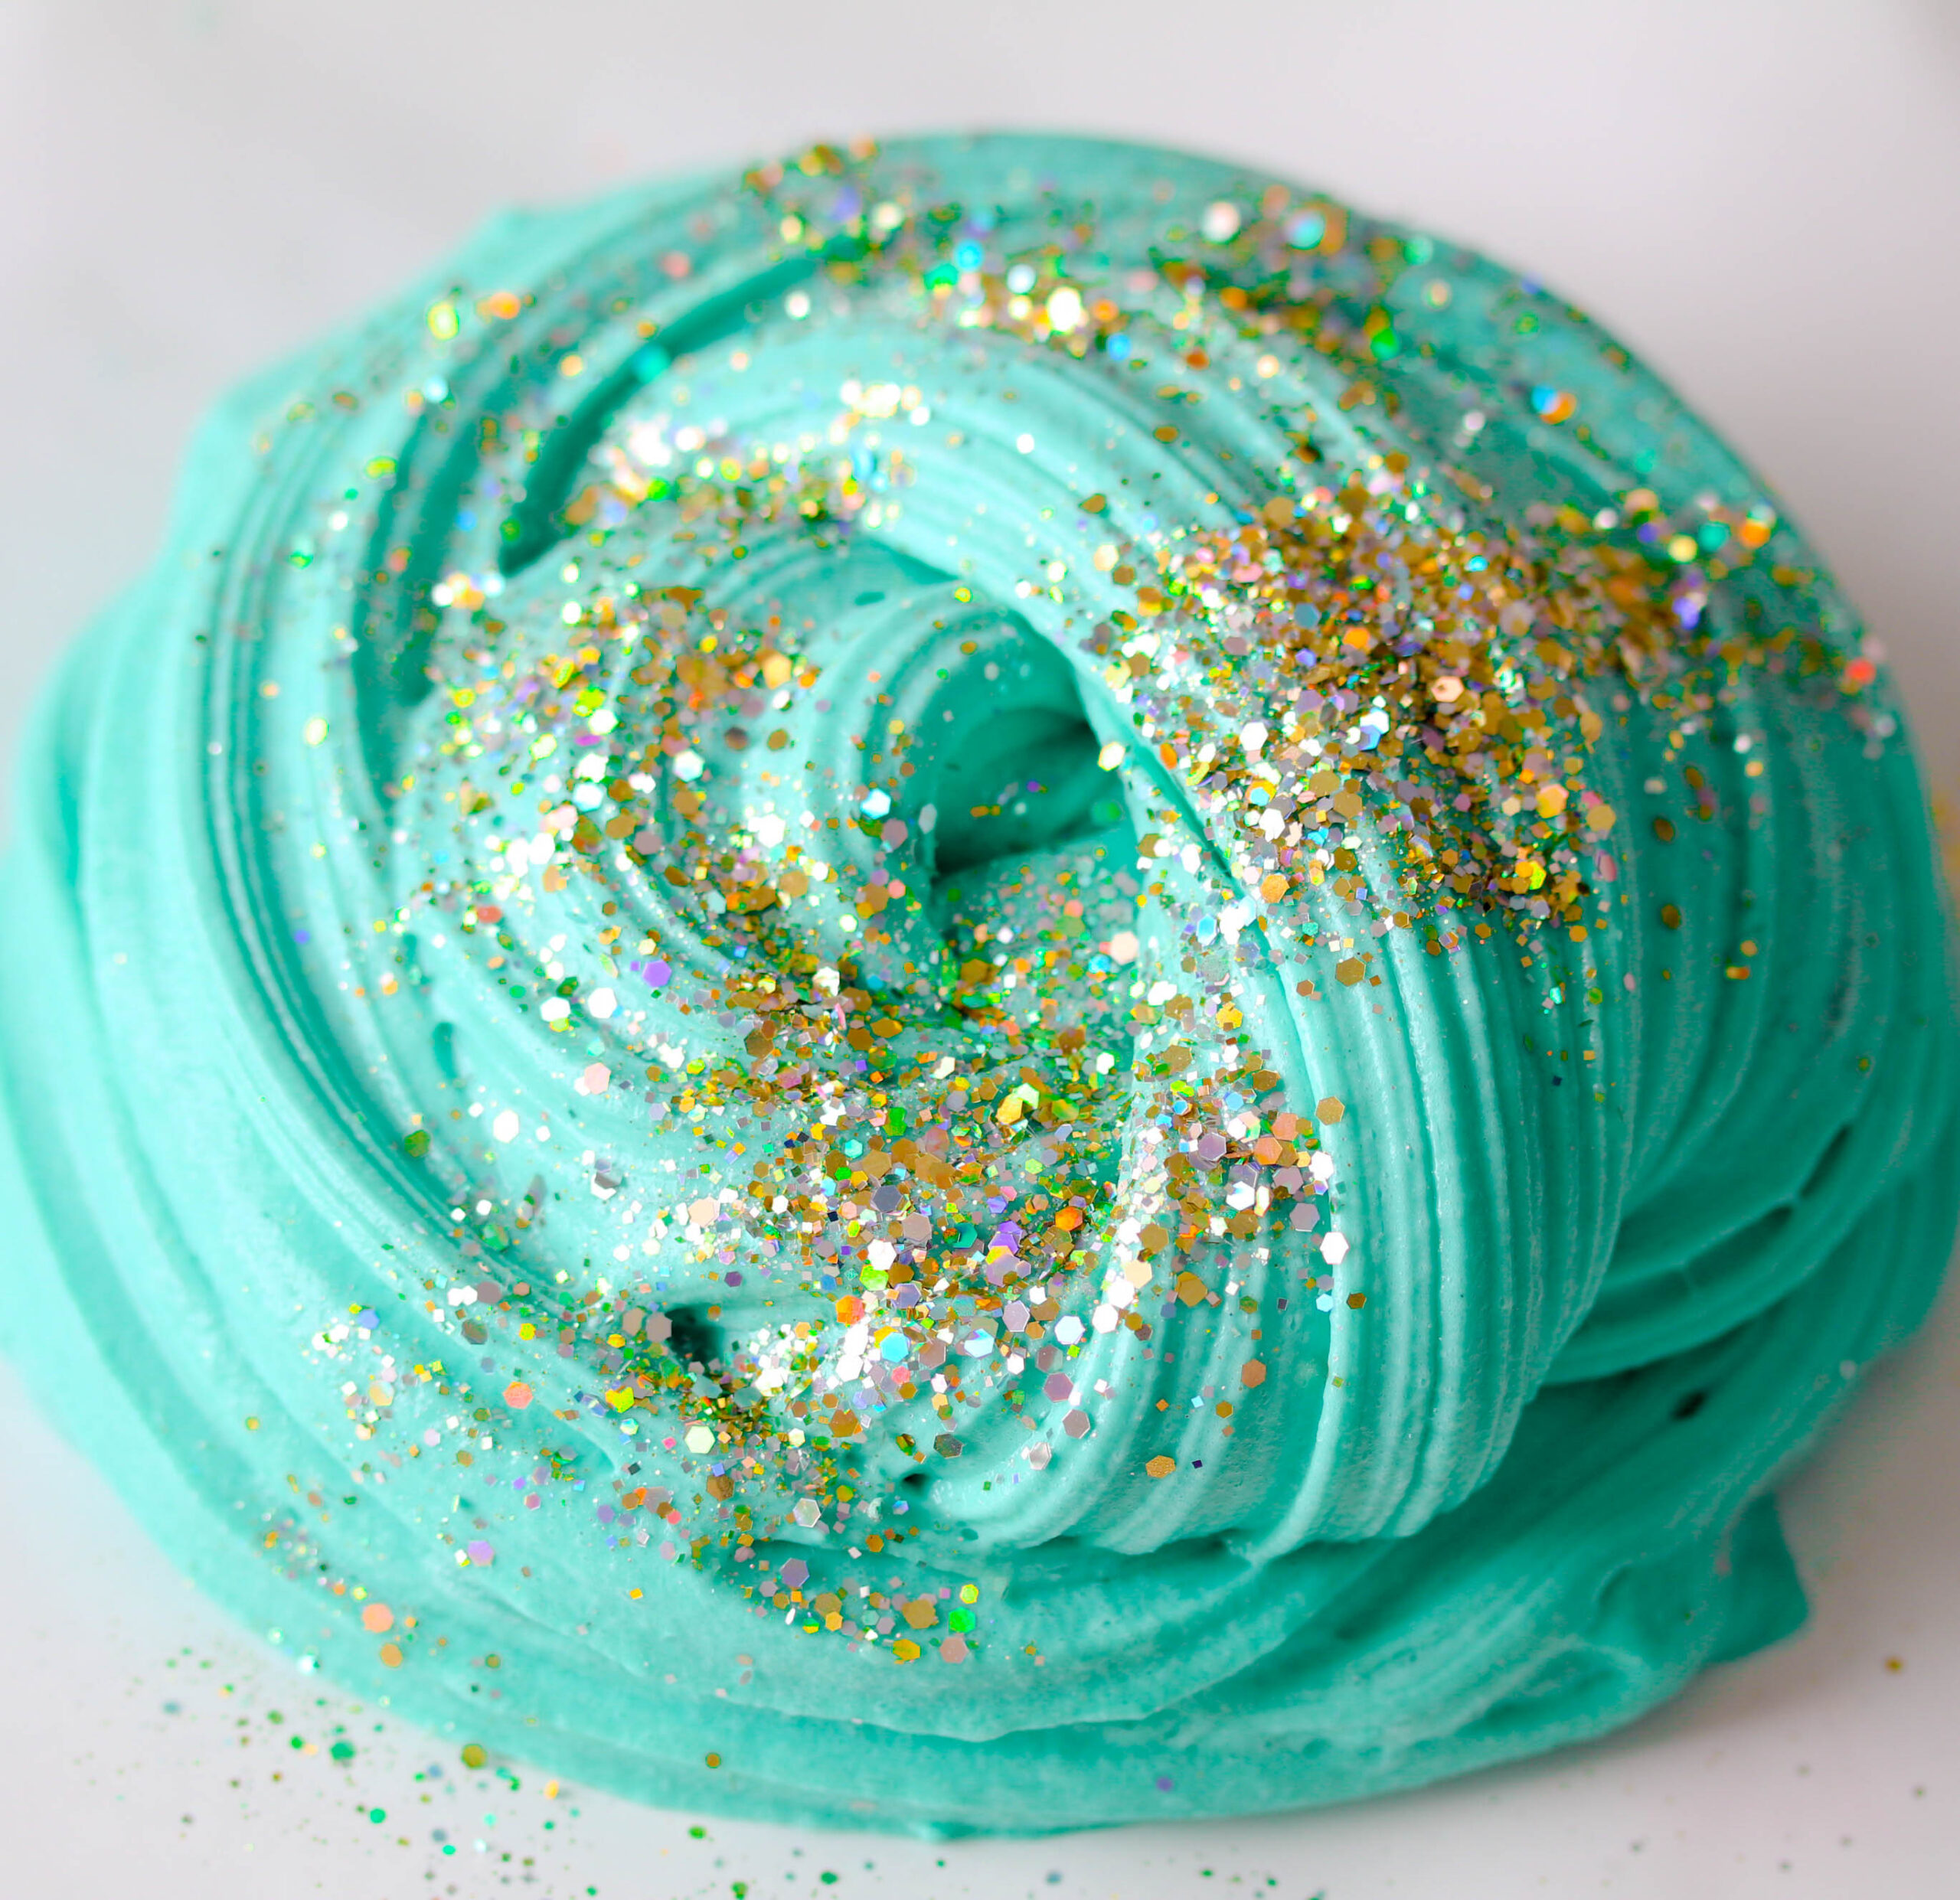
4. Glitter Slime
Overview:
Glitter slime is as sparkly as it sounds—perfect for parties, decorations, or simply adding a bit of magic to your day.
How to Make It:
- Follow the basic slime recipe.
- Once your slime starts forming, gradually add glitter (choose fine or chunky glitter based on your preference).
- Continue to mix until the glitter is evenly distributed.
Variations:
- Combine with clear slime for an elegant, shimmering effect.
- Experiment with different colors of glitter for a vibrant look.
5. Edible Slime (For Kids Only)
Overview:
Edible slime recipes are a safe alternative for younger children, using ingredients like cornstarch and sweetened condensed milk.
How to Make It:
- Combine equal parts of cornstarch and sweetened condensed milk.
- Stir until you reach a slime-like consistency.
- Add food coloring or flavor extracts if desired.
Safety Note:
- Ensure all ingredients are food-grade and safe for consumption.
- This type of slime is not as stretchy as the traditional recipe but can be a fun, edible experiment.
Each variation not only teaches you how to make slime but also opens up a realm of creativity. Experiment with different additives, textures, and colors until you find the perfect formula that suits your style and needs.
The Science Behind Slime
Ever wondered what makes slime so unique? The magic lies in its chemical properties and the fascinating science of polymers.
What Are Polymers?
Definition:
Polymers are long, repeating chains of molecules that can link together in various ways. In slime, the primary polymer is found in the glue (polyvinyl acetate).Crosslinking:
When you add an activator like borax, it triggers a chemical reaction that causes the polymer chains to link together (crosslink). This crosslinking changes the liquid glue into a more solid, yet flexible, substance—slime!
How the Ingredients Interact
Glue and Water:
The glue provides the polymer chains, while water helps to distribute the ingredients evenly.Borax (or Alternative Activators):
The activator is responsible for crosslinking. The borate ions from borax form bridges between the polymer chains, creating a network that gives slime its unique texture.Optional Additives:
Ingredients like shaving cream, glitter, or food coloring do not alter the chemical reaction significantly but add texture, color, and fun to your slime.
Why Does Slime Stretch?
Viscoelasticity:
Slime is a viscoelastic material—it behaves both like a liquid and a solid. This dual nature is due to the weak bonds formed between the polymer chains. When you stretch slime, these bonds temporarily break and then re-form when released.Temperature and Consistency:
Temperature can affect the rate of reaction and the elasticity of slime. Warmer slime might be more fluid, while cooler slime can become stiffer.
Understanding the science behind how to make slime can not only enhance your crafting experience but also serve as an exciting educational tool to explain basic chemistry and physics concepts.
For additional reading on the fascinating world of polymers, check out resources available at Science Buddies.
Real-World Applications of Slime
While making slime is a delightful and engaging activity, its applications extend far beyond simple play. Let’s explore how slime is being used in various fields and contexts.
Educational Uses
STEM Learning:
Slime provides a hands-on way to explore chemical reactions, viscosity, and polymer science. Educators use slime-making as an interactive science experiment to spark interest in chemistry and physics.Sensory Development:
In early childhood education, slime is used to enhance sensory play. Its tactile nature helps develop fine motor skills and hand-eye coordination.
Therapeutic and Stress-Relief Applications
Sensory Therapy:
Many therapists incorporate slime into sensory integration therapy sessions. The soothing texture and repetitive motion of stretching slime can help reduce stress and anxiety.Mindfulness and Relaxation:
The act of kneading and playing with slime can be a meditative experience, similar to stress balls or fidget toys, offering a simple way to relieve tension.
Artistic and Creative Expression
DIY Crafts:
Slime is a versatile medium for art projects. Whether you’re creating custom textures, mixing in pigments, or adding unique embellishments, slime offers endless creative possibilities.Social Media Trends:
Platforms like TikTok and Instagram have popularized slime challenges and tutorials, with creators building careers around innovative slime recipes and designs. These viral trends have even influenced consumer markets, with specialty slime kits now widely available.
Business and Marketing Opportunities
Product Development:
The popularity of slime has led to entrepreneurial ventures in the toy industry. Many small businesses have emerged, specializing in custom slime kits, sensory toys, and related merchandise.Educational Workshops:
Slime-making workshops are a popular event in community centers, schools, and even corporate team-building activities, highlighting its potential as a fun, educational, and interactive experience.
By understanding how to make slime and its real-world applications, you not only engage in a fun craft but also tap into a market with significant educational, therapeutic, and entrepreneurial value.
Safety Precautions and Best Practices
While slime-making is generally safe and enjoyable, it’s essential to adhere to some safety precautions and best practices to ensure a positive experience.
Handling Ingredients Safely
- Borax and Chemical Activators:
- Always handle borax with care. Use the recommended amounts and avoid prolonged skin contact.
- Store borax and other chemical activators in a secure place, out of reach of small children.
- Glue and Additives:
- Ensure you’re using non-toxic, preferably school-grade glue.
- Verify that any additional additives, like food coloring or glitter, are safe for handling and, if necessary, accidental ingestion.
Protective Measures
- Wear Gloves:
If you have sensitive skin, consider wearing gloves during mixing. - Supervise Children:
Always supervise young children during slime-making to ensure they don’t ingest any of the ingredients. - Work in a Clean, Well-Ventilated Area:
This reduces the risk of inhaling any fine particles or fumes from the ingredients.
Storage and Disposal
Proper Storage:
- Store slime in an airtight container to prevent it from drying out.
- Label containers with the date of creation, especially if you’re experimenting with different recipes.
Disposal:
- Dispose of old slime responsibly. Do not wash large amounts down the drain as it may cause clogs.
- Check local guidelines for disposing of chemical materials if using non-food-grade additives.
Following these best practices will help ensure that your adventure into how to make slime is both safe and fun.
Troubleshooting Common Slime-Making Problems
Even experienced slime makers sometimes encounter challenges. Here are some common issues and their solutions:
Slime is Too Sticky
- Solution:
Add a few extra drops of the activator (borax solution or saline solution with baking soda) and knead thoroughly. - Tip:
If you’re hesitant to add too much, add a little at a time until you reach the desired consistency.
Slime is Too Stiff or Rubbery
- Solution:
Try adding a small amount of water or even a bit more glue to soften the texture. - Tip:
Sometimes environmental factors like cold temperatures can affect slime consistency. Let it sit at room temperature and then knead it again.
Slime Doesn’t Form at All
- Solution:
Double-check your measurements and ensure that the activator is properly mixed and at the right concentration. - Tip:
Sometimes, using an alternative activator like contact lens solution with baking soda can yield better results.
Color or Texture Variations Aren’t Even
- Solution:
Make sure to mix your food coloring or additives thoroughly before adding the activator. - Tip:
Use a whisk or a fork for a more uniform blend.
How to Fix Slime That Has Dried Out
- Solution:
Add a few drops of water and knead it in until the slime regains its pliable texture. - Tip:
Store slime in an airtight container to prevent drying out in the future.
By troubleshooting these common issues, you’ll enhance your skills in how to make slime and create batches that are consistently fun and engaging.
Actionable Tips, Strategies, and Best Practices
Now that you’re equipped with the knowledge of how to make slime, here are some actionable tips to perfect your craft and encourage your creative experiments:
Start Simple, Then Innovate
- Master the Basic Recipe:
Get comfortable with the basic slime recipe before moving on to more complex variations. - Experiment Slowly:
Make small batches when trying new ingredients to see how they affect the final product.
Record Your Experiments
- Keep a Slime Journal:
Document the ratios, ingredients, and techniques used in each batch. Note what worked and what didn’t. - Take Photos:
Photograph your creations to track your progress and share your successes with the community.
Optimize Your Workspace
- Designate a Slime Station:
Set up a clean, organized area dedicated to your slime experiments. This can reduce mess and help you stay focused. - Organize Your Tools:
Keep your bowls, measuring tools, and containers neatly arranged so you can access them quickly.
Engage with the Community
- Join Online Groups:
Social media platforms and online forums have vibrant communities of slime enthusiasts. Share your recipes, ask for advice, and learn from others. - Watch Tutorials:
Video tutorials on platforms like YouTube can provide visual guidance and spark new ideas. - Attend Workshops:
Look for local DIY or science workshops that include slime-making as an activity.
Explore Seasonal and Thematic Slime
- Holiday-Inspired Slime:
Experiment with colors and additives that fit the season—think red and green for Christmas, orange and black for Halloween. - Themed Slime Parties:
Organize slime-making sessions with friends or family, making it a fun social event that doubles as a creative workshop.
These strategies will not only improve your technique in how to make slime but also make the process more engaging and rewarding.
Frequently Asked Questions (FAQ)
1. What is the best glue to use for making slime?
For most slime recipes, a white PVA glue works best due to its consistency and availability. If you prefer clear slime, opt for clear glue. Make sure the glue is non-toxic, especially if children are involved.
2. Can I make slime without using borax?
Absolutely! There are several borax-free recipes available, such as those using contact lens solution and baking soda or liquid starch as an activator. These alternatives can produce equally satisfying slime.
3. How do I store my slime to keep it from drying out?
Store your slime in an airtight container or a zip-lock bag when not in use. Keep it in a cool, dry place away from direct sunlight. If it starts to dry out, add a few drops of water and knead it well.
4. Why is my slime too sticky?
Sticky slime usually indicates that not enough activator has been added. Try adding a small amount of your activator solution and kneading the slime until it reaches the desired consistency. Be cautious, as too much can make it overly stiff.
5. How long does homemade slime last?
With proper storage in an airtight container, homemade slime can last several weeks. Over time, it may lose its stretchiness or become slightly less vibrant. Always check for any signs of mold or discoloration, especially if the slime has been stored for an extended period.
6. Is it safe to make and play with slime?
Yes, when made with non-toxic ingredients and under proper supervision, slime is generally safe for children and adults. However, ensure that all ingredients are safe for skin contact, and avoid ingesting any of the substances.
7. Can slime be reused or remixed after it starts to break down?
If your slime becomes too sticky or begins to degrade, you can often revive it by adding a few drops of water or a bit more activator. Mixing in some extra glue can also help re-establish the proper consistency.
8. What should I do if I accidentally get slime on my carpet or clothes?
Act quickly by gently scraping off as much slime as possible. For fabrics, rinse with cold water and treat with a mild detergent. For carpets, blot (do not rub) the slime with a damp cloth until it is removed. Refer to cleaning guidelines provided by your local cleaning expert for stubborn stains.
Conclusion and Call-to-Action
Learning how to make slime is more than just a fun DIY project—it’s an adventure into the science of polymers, a creative outlet, and a chance to engage with a vibrant community of makers and educators. In this guide, we’ve explored the definition and history of slime, detailed the essential ingredients and tools, provided a step-by-step guide to creating basic and creative slime variations, and delved into the science behind its fascinating properties. We’ve also addressed common issues, shared best practices, and answered frequently asked questions to help you troubleshoot any challenges.
Key Takeaways
Understanding Slime:
Slime is a versatile polymer-based material that can be easily made at home using everyday ingredients. Its ability to stretch, mold, and change textures makes it perfect for both play and educational experiments.The Science Behind It:
The chemical reaction between glue and an activator (like borax or alternatives) creates crosslinked polymers, giving slime its unique viscoelastic properties.Creative Possibilities:
From clear and glitter slime to fluffy and glow-in-the-dark variants, there are countless ways to experiment with how to make slime. These variations offer endless opportunities for creative expression and sensory play.Safety and Best Practices:
Following safety guidelines and proper storage techniques ensures that your slime-making adventures remain safe, fun, and sustainable.
Your Next Steps
Try a Recipe Today:
Gather your ingredients, set up your slime station, and experiment with the basic recipe. Once you’re comfortable, branch out into creative variations and document your results.Join the Community:
Share your creations on social media or join online forums dedicated to slime-making. Connect with others who are just as passionate about this gooey craft.Keep Learning:
Explore more advanced techniques and science experiments related to slime. Consider incorporating slime-making into educational projects or DIY workshops.Provide Feedback:
We’d love to hear about your experiences. Leave a comment or share your tips and tricks on social media. Your insights could inspire others to dive into the world of slime.
For more creative DIY projects, check out our related guides on Sensory Play Ideas and Fun Science Experiments for Kids. You can also explore external resources like DIY Slime Tutorials on YouTube for video demonstrations and additional inspiration.
Embrace your creativity, experiment with new textures and colors, and remember that every batch of slime is a step closer to mastering the art of how to make slime. Happy crafting!